


How to edge banding plywood
Materials Needed
- Plywood Panel
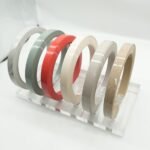
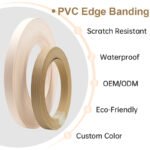
- Edge Banding (iron-on or self-adhesive)
- Iron (for iron-on banding)
- Utility Knife or Edge Banding Trimmer
- Sandpaper (medium and fine grit)
- Measuring Tape
- Scissors (for cutting banding)
- Roller or Cloth (for pressing)

Step-by-Step Instructions
- Measure and Cut the Edge Banding
- Measure the length of each edge of the plywood that needs banding.
- Cut the edge banding to size, allowing for a slight overhang (about 1/8 inch) on each end.
- Prepare the Plywood Edge
- Ensure the edge is clean and smooth.
- Sand any rough spots to create a smooth surface for the banding to adhere to.
- Apply the Edge Banding
- For Iron-On Banding:
- Place the edge banding on the edge of the plywood, aligning it carefully.
- Set the iron to a medium heat (no steam).
- Press the iron onto the banding for a few seconds, moving it along the length to activate the adhesive.
- For Self-Adhesive Banding:
- Peel off the backing and press the banding firmly onto the edge of the plywood, ensuring it is straight and aligned.
- For Iron-On Banding:
- Press Down the Banding
- Use a roller or a clean cloth to press the banding down firmly, ensuring good adhesion.
- Trim the Excess Banding
- Use a utility knife or edge banding trimmer to carefully trim away the excess banding, cutting flush with the plywood surface.
- Be careful to make clean cuts to avoid damaging the plywood.
- Sand the Edges
- Lightly sand the edges where the banding meets the plywood using medium-grit sandpaper, then finish with fine-grit sandpaper for a smooth finish.
- Final Inspection
- Check for any rough spots or areas where the banding may not be adhered properly. Make adjustments as needed.

Tips for Success
- Iron Temperature: Ensure the iron is hot enough to activate the adhesive but not so hot that it damages the banding.
- Practice: If you’re new to this, practice on a scrap piece of plywood first.
- Choose Quality Materials: Select high-quality edge banding that matches your plywood for the best aesthetic results.


Leave a Reply