
As a core auxiliary material in furniture manufacturing and decorative renovation, the quality selection, process application, and post-maintenance of edge banding directly determine the durability, aesthetics, and environmental safety of products. Combining authoritative standards such as ASTM, ISO, and GB/T, as well as practical industry experience, this article provides in-depth explanations of 30 core questions, offering comprehensive references for manufacturers, decoration practitioners, and ordinary consumers.
I. Basic Cognition
1. What is Edge Banding? What are its Core Values?
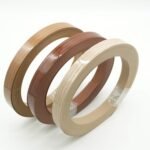
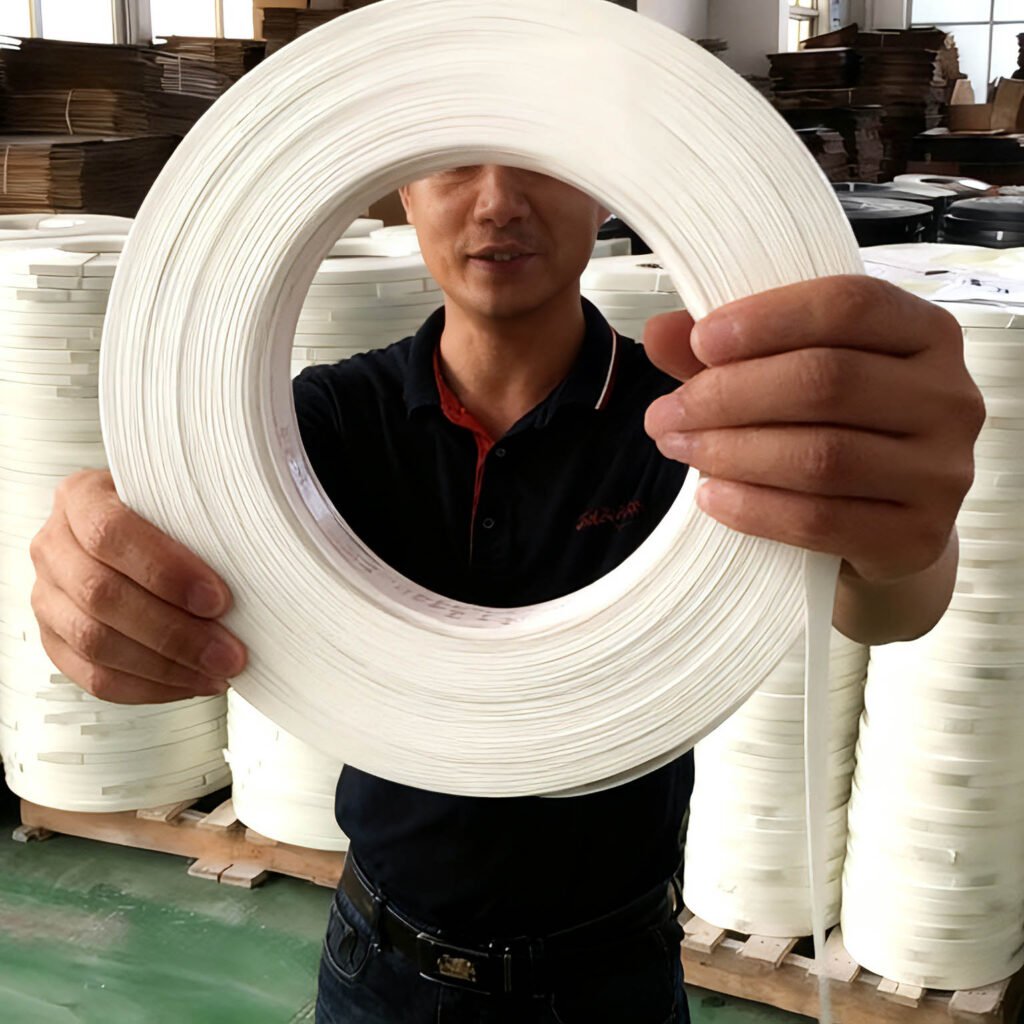
Edge banding refers to a narrow strip material produced through processes like extrusion and cutting. It is specifically designed to cover the exposed edges of boards such as plywood, particleboard, Medium-Density Fiberboard (MDF), and aluminum honeycomb panels, forming a complete decorative and protective structure. It is not merely a “decorative edge” but integrates multiple core values:
- Structural Protection: Board edges are structurally vulnerable areas. Edge banding can block moisture and dust from penetrating into the board, preventing fiber expansion and structural loosening. This is particularly crucial for particleboard and MDF, which have strong hygroscopicity. During the plum rain season in southern China, the moisture content of unedged cabinet boards may rise by over 15%, leading to deformation and cracking. However, high-quality edge banding can control the moisture content within a safe range of 8%-12%.
- Safety Protection: It eliminates burrs and sharp corners on board edges, preventing skin scratches during use, which is especially suitable for children’s furniture and kitchen scenarios. According to household safety standards, the fillet radius of board edges after edging should be no less than 1mm.
- Aesthetic Enhancement: By simulating solid wood textures, metal textures, or solid-color designs, it achieves visual unity between the edge banding and the board surface, enhancing product quality. In high-end customization, the color matching degree (ΔE ≤ 1.5) of edge banding is a key indicator for evaluating aesthetics.
- Environmental Strengthening: It seals the release channels of volatile organic compounds (VOCs) such as formaldehyde inside the board. Combined with environmentally friendly edging processes, the indoor formaldehyde concentration can be controlled at ≤0.05mg/m³ (in compliance with GB 18580-2017 standard).
From a developmental perspective, edge banding has evolved from early solid wood strips to a diverse material system, with application scenarios expanding from traditional furniture to customized home furnishings, commercial display cabinets, and medical furniture.
2. What are the Main Materials of Edge Banding? What are Their Performance Differences and Applicable Scenarios?
According to the testing classification standards of the Beijing Inspection and Quarantine Institute, the main materials of edge banding can be divided into six categories. Their performance differences directly determine their applicable scenarios, with specific comparisons as follows:
- PVC Edge Banding: Made of polyvinyl chloride resin mixed with plasticizers and stabilizers, it is available in both soft and rigid types. Its advantages include high cost-effectiveness (0.5-2 yuan/meter), rich colors, and chemical corrosion resistance, capable of simulating various textures such as wood grain and stone. However, it contains chlorine components, may release HCl gas at high temperatures, becomes brittle at low temperatures, and has lower environmental performance than ABS. Applicable scenarios: Mid-to-low-end furniture, rental housing decoration, and non-humid environments (such as the interior of bedroom wardrobes). When purchasing, attention should be paid to checking the plasticizer content; high-quality products should have a plasticizer migration amount of ≤5mg/kg.
- ABS Edge Banding: An engineering plastic made of acrylonitrile-butadiene-styrene copolymer, free of chlorine. Its core advantages are excellent environmental performance (VOC emission ≤0.5mg/(m²·h)), high impact strength (≥15kJ/m²), strong weather resistance (stable at -40℃ to 80℃), and no pungent odor when burned. The disadvantage is that its cost is 30%-50% higher than that of PVC, and its flexibility is slightly inferior. Applicable scenarios: High-end furniture, kitchen cabinets, children’s furniture, especially suitable for humid environments or areas with large temperature differences.
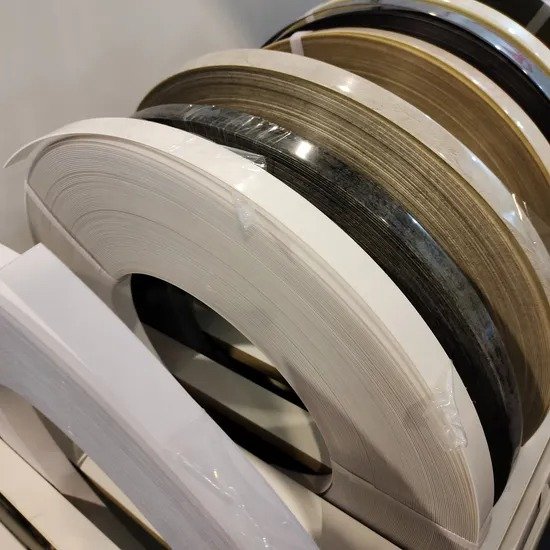
- Wooden Edge Banding: Including solid wood strips and veneer composite strips, it is naturally environmentally friendly with natural textures. Solid wood strips are cut from logs such as pine and oak, which can perfectly match solid wood boards. Veneer composite strips use MDF as the base material with veneer attached to the surface, and their cost is lower than that of solid wood strips. Advantages: Warm texture, can be directly sanded and dyed. Disadvantages: Prone to moisture deformation, requires regular painting and maintenance, and has poor wear resistance. Applicable scenarios: High-end solid wood furniture, Chinese-style decoration, customized bookcases, and other scenarios with high texture requirements, with a price usually ranging from 10 to 30 yuan/meter.
- Melamine Edge Banding: Its base material is paper or non-woven fabric, made by impregnating melamine resin and laminating. Advantages: High temperature resistance (no deformation above 200℃), wear resistance (wear value ≤0.08g/100r), high surface hardness, and high color matching degree with melamine decorative boards. Disadvantages: Poor flexibility, easy to crack, not suitable for curved edge banding. Applicable scenarios: High-frequency use areas such as kitchen countertops, laboratory furniture, and commercial display cabinets.
- TPE/TPU Edge Banding: A thermoplastic elastomer material that combines the elasticity of rubber and the processability of plastic. Advantages: Excellent flexibility (bendable radius ≤5mm), anti-slip and wear-resistant, environmentally friendly and odorless, and recyclable. Disadvantages: High cost and slightly poor oil resistance. Applicable scenarios: Curved furniture, bathroom cabinets, children’s toy cabinets, and other scenarios requiring flexible edges.
- Metal Composite Edge Banding: Uses aluminum-magnesium alloy as the base material, with the surface covered with PET film or subjected to anodizing treatment. Advantages: High-end texture, wear resistance, fire and moisture resistance, and service life of more than 15 years. Disadvantages: Heavy weight, high processing difficulty, and requires special metal edge banding equipment.
Material selection should follow the principle of “scenario matching”. For example, ABS or metal edge banding is preferred for kitchens, TPE or ABS for children’s rooms, PVC for limited budgets, and wooden or laser-specific PP edge banding for high-end customization.
3. How to Scientifically Select the Thickness and Width of Edge Banding? What are the Quantitative Standards?
The size selection of edge banding is not a subjective judgment. It needs to be quantitatively matched based on factors such as board thickness, frequency of use, and processing technology, with reference to size testing standards such as GB/T 6344-2008:
- Thickness Selection: The thickness range is usually 0.4mm-3mm, and the core basis is the stress strength and wear frequency of the board:
- 0.4-0.6mm: Thin edge banding, mainly used for decorative boards (such as background wall decorative panels) and light partition boards. Its advantage is good adhesion, which can reduce trimming work, but its protective ability is weak, making it unsuitable for high-frequency contact scenarios.
- 0.8-1.2mm: Standard thickness, suitable for ordinary furniture boards with a thickness of 16-25mm (such as wardrobe side panels and desk tops). It balances protectiveness and economy, and is the mainstream choice for home customization. Tests show that the peel strength of 1.0mm thick ABS edge banding can reach 1.5N/mm, meeting daily use needs.
- 1.5-2mm: Reinforced thickness, used for frequently used furniture (such as kitchen cabinet doors and office desks and chairs). It can withstand frequent opening and closing as well as friction, and the edge is fuller after trimming. In the catering industry, the service life of this type of edge banding is more than 60% longer than that of 1.0mm thick edge banding.
- 2-3mm: Heavy-duty thickness, suitable for commercial furniture (such as shopping mall fitting rooms and hospital treatment tables) and industrial equipment operation platforms. It needs to be combined with PUR or laser edge banding technology, with a peel strength of more than 2.5N/mm and significantly improved impact resistance.
- Width Selection: The core principle is “2-3mm wider than the board thickness” to ensure that the edge banding can fully cover the board edge and reserve trimming allowance. Common widths include 12mm (for 9mm boards), 15mm (for 12mm boards), 19mm (for 16mm boards), and 25mm (for 22mm boards). For example, a 20mm thick cabinet board should use edge banding with a width of 22-23mm to avoid edge exposure due to insufficient width.
- Adjustments for Special Scenarios: For curved edge banding, materials 1-2mm wider than those for straight edge banding should be selected to compensate for the tensile loss during the bending process. For beveled edge banding (45° chamfer), the width should be calculated based on the chamfer size to ensure complete coverage after chamfering.
II. Process Technology
4. What are the Core Differences Between EVA, PUR, and Laser Edge Banding Processes? How to Select the Right One?
Edge banding processes directly determine the bonding strength and service life. The three mainstream processes differ significantly in technical principles, performance indicators, and costs. Selection should be based on a comprehensive judgment of budget, scenarios, and environmental requirements:
| Comparison Dimension | EVA Edge Banding | PUR Edge Banding | Laser Edge Banding |
|---|---|---|---|
| Technical Principle | EVA hot-melt adhesive (ethylene-vinyl acetate copolymer) is heated to 160-180℃ to melt, and bonding is achieved through physical cooling, belonging to physical bonding. | PUR reactive hot-melt adhesive is heated to 120-150℃ and reacts with moisture in the air to cure, forming irreversible chemical bonding. | Laser (mainly with a wavelength of 980nm) activates the polymer functional layer on the back of the edge banding, which melts instantly to achieve “seamless welding” without glue involvement. |
| Bonding Strength | Peel strength: 0.8-1.2N/mm, easily affected by temperature and humidity. | Peel strength: 1.8-2.5N/mm, no re-adhesion after curing. | Peel strength: 2.5-3.0N/mm, forming an integrated structure with the board. |
| Glue Line Performance | Obvious (0.3-0.5mm), prone to dust accumulation and blackening. | Faint (0.1-0.2mm), color close to the board. | Almost no glue line, visually seamless. |
| Weather Resistance | Poor, temperature resistance ≤70℃, cracking occurs in humid environments within 3-5 years. | Excellent, temperature resistance from -40℃ to 120℃, moisture-proof and anti-aging. | Extremely excellent, temperature resistance from -50℃ to 150℃, chemical corrosion resistance. |
| Environmental Indicators | High VOC emission, formaldehyde ≤0.1mg/m³. | Low VOC emission, formaldehyde ≤0.05mg/m³. | Zero glue and zero VOC, optimal environmental performance. |
| Cost Composition | Glue price: 10-30 yuan/kg, equipment: 30,000-200,000 yuan, processing fee: 30-50 yuan/square meter (projection area). | Glue price: 80-120 yuan/kg, equipment: 500,000-1,000,000 yuan, processing fee: 50-80 yuan/square meter (projection area). | Edge banding price: 3 times higher, equipment: over 5,000,000 yuan, processing fee: 100-150 yuan/square meter (projection area). |
| Applicable Scenarios | Non-core areas such as rental housing, transition housing, and wardrobe interiors. | Home essential scenarios (kitchen, balcony, bedroom), cost-effective choice. | High-end customization, open cabinets, environmentally sensitive places (hospitals/schools). |
Selection tips: Choose EVA for a budget of less than 1,000 yuan/square meter, PUR for 1,000-2,000 yuan/square meter, and laser edge banding for core areas with a budget of more than 2,000 yuan/square meter. The process type should be clearly stated in the contract to prevent merchants from passing off EVA as PUR.
5. How to Accurately Distinguish Between PVC and ABS Edge Banding? What are the Practical Testing Methods?
PVC and ABS edge banding are easily confused in appearance, but they have significant differences in material properties. They can be accurately distinguished through multi-dimensional testing methods such as physical, chemical, and combustion tests to avoid being deceived by merchants who substitute inferior products for high-quality ones:
- Basic Physical Identification:
- Weight Comparison: Under the same size, the density of ABS (1.05g/cm³) is lower than that of PVC (1.35g/cm³), so it feels lighter. For example, a 1m long, 19mm wide, and 1.0mm thick edge banding weighs about 20g for ABS and 26g for PVC, with an obvious difference.
- Flexibility Test: At room temperature, PVC has better flexibility and can be bent 180° without cracking; ABS is relatively brittle and tends to show white marks or crack when the bending angle exceeds 90°. At low temperatures (below 0℃), PVC becomes hard and brittle, while ABS still maintains a certain degree of toughness.
- Surface Texture: High-quality ABS edge banding has a smooth surface without granular feeling and clear natural texture; if PVC edge banding contains excessive calcium carbonate filler, its surface is prone to pitting and has low gloss. The edge can be touched by hand—ABS feels smoother.
- Combustion Identification (Operate with Caution, Small Sample Testing Recommended):
- PVC Edge Banding: When burned, the flame is yellow-green with black smoke, and emits a pungent HCl odor (similar to the sour smell of burning plastic). It self-extinguishes when away from the fire source, leaving a black hard block after burning, which is brittle when rubbed by hand.
- ABS Edge Banding: When burned, the flame is blue with white smoke, and has no obvious pungent odor (similar to candle burning). It continues to burn when away from the fire source, leaving light brown molten droplets after burning, which can be kneaded into powder after cooling.
- Professional Testing Methods:
- Density Test: According to GB/T 1033.1-2008, when edge banding samples are immersed in water, ABS has better floatability, while PVC sinks faster.
- Thermal Stability Test: When samples are placed in an oven at 80℃ for 24 hours, PVC is prone to discoloration and yellowing, while ABS basically maintains its original color.
- Component Analysis: Through infrared spectroscopy testing, PVC has characteristic peaks of chlorine elements, and ABS has characteristic peaks of benzene rings, which can be accurately distinguished.
- Purchase Tips to Avoid Pitfalls: Ask merchants for material test reports and check whether they comply with the GB/T 2914-2008 environmental protection standard; focus on checking the back coating of the edge banding (ABS has a more uniform back coating) and avoid purchasing low-quality products without back coating.
6. What are the Differences in Installation Processes Between Pre-glued and Non-pre-glued Edge Banding? What are the Operation Points?
Edge banding is divided into pre-glued (with built-in adhesive) and non-pre-glued (without adhesive) according to the back adhesive state. The installation processes and tools differ significantly, and different operation specifications must be followed to ensure bonding quality:
(1) Pre-glued Edge Banding: Suitable for Manual Operation, DIY-friendly
The core principle is to activate the back adhesive (usually EVA or pressure-sensitive adhesive) through heating to achieve rapid bonding. The process is as follows:
- Preliminary Preparation: Tools include a temperature-adjustable constant-temperature iron, a rubber pressure roller (20-30mm in width), a utility knife, fine sandpaper (400 grit), a tape measure, and a pencil. The board edge should be sanded smooth with sandpaper to remove burrs, and the misalignment tolerance should be ≤0.2mm.
- Size Cutting: Cut the edge banding according to the length of the board edge, reserving a 5-10mm allowance (for subsequent trimming). The cutting angle should be kept at 90° to avoid poor adhesion caused by beveling.
- Heating Activation: Adjust the iron temperature to 120-150℃ (120-130℃ for EVA back adhesive, 130-150℃ for pressure-sensitive adhesive), and heat the back adhesive surface of the edge banding at a constant speed for 2-3 seconds until the back adhesive slightly melts but does not flow. Attention should be paid to avoiding excessive temperature leading to carbonization of the back adhesive.
- Pressing and Fixing: Immediately align the edge banding with the board edge for bonding after heating, and roll it evenly from the middle to both sides with a rubber pressure roller, maintaining a pressure of 0.3-0.5MPa to ensure uniform distribution of the adhesive layer without air bubbles. Curved edges should be pressed in sections, with each section length not exceeding 10cm.
- Cooling and Trimming: Let it stand for 5-10 minutes until the adhesive layer is completely cooled (can be shortened to 3 minutes in summer). Cut off the excess edge banding at a 45° angle along the board surface with a utility knife, and then sand the edge smooth with fine sandpaper to avoid sharp edges and corners.
Applicable scenarios: Home DIY decoration, local repair, small-batch production. It is not recommended for humid environments such as kitchens and bathrooms.
(2) Non-pre-glued Edge Banding: Industrial-grade Installation, Requiring Professional Equipment
It needs to be coated with glue using a hot-melt glue machine or edge banding machine, suitable for mass production. The process is more complex but the bonding quality is more stable:
- Equipment and Material Preparation: Edge banding machine (with pre-milling, gluing, pressing, end-trimming, and edge-trimming functions), hot-melt glue (EVA glue at 170-190℃, PUR glue at 120-150℃), cleaning brush, edge-trimming knife, and polishing cloth. The hot-melt glue should be of a type matching the edge banding material (such as polar glue for ABS edge banding).
- Board Preprocessing: Trim the board edge with a pre-milling knife of the edge banding machine to ensure a smooth edge. The milling speed should match the conveying speed (usually 8-12m/min) to avoid waviness.
- Glue Coating and Pressing: The glue-coating roller evenly applies hot-melt glue to the board edge, with the glue coating amount controlled at 80-120g/m (slightly more for EVA glue, slightly less for PUR glue). The edge banding is bonded to the board through a tape-feeding mechanism, with the pressure roller pressure maintained at 0.5-0.8MPa and the pressing time at 1-2 seconds. The temperature of the glue-coating roller should be 10-15℃ higher than the glue temperature to ensure glue fluidity.
- End-trimming: Cut off the excess length of the edge banding with front and rear end-trimming knives. The end-trimming speed should be synchronized with the conveying speed (tolerance ≤0.1m/min) to avoid board bumping or uneven cutting edges. The end-trimming knife should be sharpened regularly to maintain sharpness.
- Fine Trimming: First trim the upper and lower edges with a rough trimming knife, then trim to be flush with the board with a fine trimming knife, and finally polish with a polishing wheel to remove trimming marks and make the edge smooth and rounded. The trimming angle is usually 15-30° to avoid excessive trimming leading to excessively thin edge banding.
Applicable scenarios: Mass production in furniture factories, whole-house customization projects. It can be used in various environments, and can meet the needs of humid environments when combined with PUR glue.
7. What are the Key Requirements for Board Edge Processing Before Edge Banding? How to Ensure Processing Quality?
Board edge processing is the “foundation project” of edge banding quality, directly affecting the bonding strength and glue line aesthetics. It needs to meet the requirements for substrate surfaces specified in the ASTM D412 mechanical test standard:
- Core Quality Indicators:
- Flatness: The straightness error of the edge should be ≤0.2mm/m, without unevenness or waviness. It can be tested by attaching a straightedge to the edge, with a gap not exceeding 0.1mm.
- Smoothness: The surface roughness Ra should be ≤6.3μm, without burrs or wood chip residues, and no obvious granular feeling when touched by hand.
- Moisture Content: The moisture content of the board should be controlled at 8%-12%. Excessively high moisture content can easily lead to glue failure, while excessively low moisture content results in weak bonding. In humid areas, the board should be dried, and in dry areas, water can be properly sprayed for adjustment.
- Perpendicularity: The perpendicularity error between the board edge and the surface should be ≤0.1° to avoid uneven edge banding adhesion with one side wider and the other narrower.
- Specific Processing Process:
- Cutting and Trimming: Cut the board with a precision panel saw, with the saw blade rotation speed ≥4000r/min and the feed speed 3-5m/min to ensure a flat cut. If there is slight edge chipping after cutting, smooth it with a utility knife along the edge.
- Pre-milling Processing: In industrial production, the board edge is trimmed with a pre-milling knife of the edge banding machine, with the milling knife rotation speed 10000-12000r/min and the milling amount 0.1-0.2mm to remove cutting marks and form a fresh bonding surface. For manual operation, a portable edge trimmer can be used, with a straight edge guide to ensure flat milling.
- Sanding and Cleaning: Sand the edge longitudinally with 400-grit fine sandpaper (avoid transverse sanding to prevent scratches), covering the entire edge banding area. After sanding, clean the wood chips with compressed air or a brush to ensure no dust residues, otherwise air bubbles will appear in the adhesive layer.
- Special Processing:
- Moist Board: Dry the edge with a heat gun (temperature 50-60℃) for 5-10 minutes, avoiding direct high-temperature baking to prevent board cracking.
- High-density Board: A small amount of substrate treatment agent (such as water-based polyurethane primer) can be applied to the edge to enhance glue adhesion. The treatment agent should be air-dried before edge banding.
- Special-shaped Edge: Curved or beveled edges should be manually sanded with sandpaper, with a template to ensure consistent shape. After sanding, wipe clean with a cloth.
- Quality Inspection: Irradiate the processed edge with strong light to check for no obvious scratches or depressions; slide fingers along the edge to check for no burrs; drop a drop of water on the edge to check for uniform water film without penetration (indicating a clean and dry surface).
III. Problem-solving
8. What are the Root Causes of Common Edge Banding Problems (Falling Off, Glue Lines, Warping, etc.)? How to Solve Them Systematically?
Edge banding quality problems are mostly caused by mismatches between the three elements of “material-equipment-environment”. It is necessary to accurately locate the root cause and take targeted measures. The following are solutions to four core problems:
(1) Unfirm Edge Banding/Falling Off: Core Solution for Bonding Failure
- Core Causes:
- Adhesive Layer Issues: Insufficient glue coating amount (<80g/m), low glue temperature (EVA <170℃, PUR <120℃), and expired glue (EVA glue usually has a shelf life of 6 months).
- Substrate Issues: Dust on the edge, excessively high moisture content (>15%), and excessively low surface roughness (Ra <3.2μm, insufficient adhesion).
- Process Issues: Insufficient pressure roller pressure (<0.3MPa), short pressing time (<1 second), and mismatched edge banding and board materials (such as polar glue used for PVC edge banding).
- Solution Steps:
- Glue Inspection: Check the glue temperature (measure the surface temperature of the glue roller with a thermometer), increase the set temperature if insufficient; observe the glue coating amount to ensure uniform coverage of the edge (2-3mm in width); replace expired glue and select a type matching the edge banding.
- Substrate Processing: Re-sand the edge and clean the dust; dry the moist board (reduce the moisture content to below 12%); apply substrate treatment agent to high-density boards.
- Process Adjustment: Increase the pressure roller pressure to 0.5-0.8MPa; extend the pressing time to 1.5-2 seconds; ensure the back coating of the edge banding is intact (no missing coating or peeling).
- Repair Plan: For small-area falling off, reheat the edge and apply additional glue, then fix it with a clamp for 24 hours; for large-area falling off, remove the old edge banding, reprocess the edge, and perform edge banding again.
(2) Obvious Glue Lines: Fine Adjustment for Aesthetics
- Core Causes: Excessive glue coating amount (>120g/m), mismatched glue open time and machine speed (EVA usually has an open time of 3-5 seconds, and excessive machine speed leads to uncured glue), large color difference between edge banding and board, and incomplete trimming.
- Solution Steps:
- Glue Amount Control: Reduce the glue coating amount through the glue roller adjustment knob, ensuring the adhesive layer just covers the edge without overflow; PUR glue can select a fine glue line type (glue line width ≤0.1mm).
- Parameter Matching: Control the EVA edge banding machine speed at 8-10m/min and the PUR machine speed at 6-8m/min to ensure the glue is pressed within the open time; increase the glue temperature by 5-10℃ to enhance glue fluidity and reduce accumulation.
- Color Matching: Select edge banding with ΔE ≤1.5 with the board, and the glue line color should be as close to the board as possible; laser edge banding can completely eliminate glue line problems, suitable for high-end needs.
- Fine Trimming: Trim the edge with a fine trimming knife (blade angle 30°) close to the board surface, lightly sand with 600-grit sandpaper after trimming, and wipe the glue line with polishing paste to reduce visual differences.
(3) Edge Banding Warping/Deformation: Key Control for Structural Stability
- Core Causes: Improper storage (temperature <10℃ or humidity >70%), uneven moisture content of edge banding (≤6% is qualified), shrinkage stress caused by uneven glue distribution, and excessive temperature during trimming.
- Solution Steps:
- Storage Improvement: Store edge banding in an environment with a temperature of 18-25℃ and a relative humidity of 40%-60%, stack it flat (height ≤1m), and avoid hanging or squeezing; newly purchased edge banding should be left to stand for 24 hours to balance temperature and humidity before use.
- Process Adjustment: Ensure uniform glue coating to avoid excessive local glue amount; control the trimming knife temperature below 50℃ (water cooling can be used for temperature reduction) to reduce thermal deformation of the edge banding.
- Correction Processing: Slight warping can be corrected by pressing with heavy objects for 24 hours; for severe deformation, the edge banding should be replaced with a warp-resistant type reinforced with glass fiber (such as ABS + glass fiber composite edge banding).
(4) Serrated Edge After Trimming: Tool and Parameter Optimization
- Core Causes: Dull trimming knife (with nicks on the blade), high hardness of edge banding (such as PVC with excessive calcium carbonate), mismatched knife speed and machine speed (knife speed lower than machine speed), and uneven pressure roller pressure leading to vibration.
- Solution Steps:
- Tool Maintenance: Replace the dull knife or re-sharpen it (maintain the blade angle at 20-25°); regularly clean the glue residue in the knife groove to avoid blockage.
- Material Selection: Replace with edge banding of low hardness (Shore hardness ≤85D), or select a special trimming knife (such as alloy blade suitable for ABS edge banding).
- Parameter Calibration: Increase the trimming knife rotation speed to 12000-15000r/min and reduce the machine speed to 6-8m/min; adjust the pressure roller pressure to be uniform (left-right pressure difference ≤0.1MPa) to reduce vibration.
- Post-repair: Slight serrations can be sanded longitudinally along the edge with 600-grit sandpaper; for severe cases, re-trimming is required to ensure a sharp blade.

9. Why are Edge Banding Problems Prone to Occur in Winter? What are the Targeted Process Adjustment Plans?
Low temperature (<15℃) and low humidity environments in winter can lead to reduced glue fluidity, board shrinkage, and hardening of edge banding, which in turn cause problems such as weak bonding and edge warping. Systematic adjustments are required from three aspects: “environment control, material preheating, and process optimization”:
- Core Problem Causes:
- Deteriorated Glue Performance: The viscosity of EVA glue increases by more than 50% below 10℃, resulting in poor fluidity and uneven glue coating; the reaction speed of PUR glue slows down, and the curing time extends from 24 hours to more than 48 hours.
- Material Shrinkage and Deformation: The lateral shrinkage rate of the board at low temperature is about 0.1%-0.2%, leading to changes in edge size; the flexibility of edge banding (especially PVC) decreases, making it prone to brittleness and cracking.
- Rapid Heat Loss: The temperature of the glue drops rapidly after coating (5-8℃ per second), and it begins to cure before completing the pressing, resulting in a 30% or more decrease in bonding strength.
- Targeted Adjustment Plans:
- Ambient Temperature Control:
- Workshop Heating: Increase the temperature of the edge banding area to above 18℃, which can be achieved by air conditioning or heating. Avoid local temperature differences (such as adding windshields near doors and windows).
- Local Heat Preservation: Install heat preservation covers around the edge banding machine, and wrap the glue tank with heating sleeves to ensure stable glue temperature; cover unused edge banding with heat preservation cotton during manual operation.
- Material Preheating Treatment:
- Board Preheating: Place the board in a preheating room at 25-30℃ for 24 hours, or heat the edge with a heat gun (temperature 60-80℃) for 5-10 seconds to ensure the edge temperature is ≥15℃.
- Edge Banding Preheating: Rolled edge banding can be preheated in a constant-temperature oven (40℃) for 2 hours, stacked loosely to avoid extrusion deformation; single edge banding can be quickly heated on the back adhesive surface with a low-temperature electric iron (80℃).
- Glue Preheating: Increase the EVA glue temperature by 10-15℃ (from 170℃ to 180-185℃), and increase the PUR glue temperature by 5-10℃ (from 120℃ to 125-130℃); keep the glue in the glue tank at a full level to reduce the heat dissipation area.
- Process Parameter Optimization:
- Glue Coating Adjustment: Increase the glue coating amount by 10%-20% (from 100g/m to 110-120g/m), and increase the glue roller rotation speed by 5%-10% to ensure uniform glue coverage; select hot-melt glue with “long open time” (EVA open time 5-8 seconds, PUR open time 10-15 seconds).
- Pressing Strengthening: Increase the pressure roller pressure from 0.5MPa to 0.8MPa, and extend the pressing time from 1 second to 2 seconds; adopt a double pressure roller structure to increase the pressing contact area.
- Machine Speed Reduction: Reduce the edge banding machine speed from 10m/min to 6-8m/min to provide sufficient time for glue flow and curing; increase the trimming knife rotation speed to 15000r/min to avoid edge banding brittleness and cracking.
- Post-maintenance: Place the edge-banded board in a maintenance room at 20-25℃ for more than 48 hours, avoiding immediate transportation or installation; when installing furniture in winter, avoid placing the edge banding near heating or air conditioning vents to reduce temperature fluctuations.
- Ambient Temperature Control:
- Emergency Treatment: For slight glue opening, additional glue can be applied with a hot-melt glue gun at room temperature, and fixed with a clamp for 24 hours; avoid edge banding operation in an environment below 10℃, otherwise production should be suspended.
10. How to Quickly Troubleshoot and Repair Common Edge Banding Machine Faults (Belt Deviation, End-trimming Alarm, Uneven Glue Coating)?
Edge banding machine faults directly affect production efficiency. It is necessary to master basic troubleshooting methods to quickly locate and solve fault points. The following are maintenance guides for three high-frequency faults:
(1) Belt Deviation Fault (Vertical Deviation of Edge Banding): Accurate Calibration of the Belt Feeding System
- Core Causes: Uneven belt feeding table and conveyor belt, wear of belt feeding wheel/counter pressure wheel, inclined pressure wheel area, and asynchronous speed.
- Troubleshooting and Maintenance Steps:
- Levelness Detection: Measure the belt feeding table and conveyor belt surface with a level. If the error is >0.1mm/m, loosen the fixing screws, insert thin copper sheets to adjust to parallelism, and then tighten the screws.
- Component Inspection: Check the surfaces of the belt feeding wheel and counter pressure wheel. If there are grooves or wear (depth >0.2mm), replace them with new ones; if the wheel axle is loose, tighten the fixing nuts and apply lubricating oil.
- Pressure Wheel Adjustment: Loosen the fixing bolts of the pressure wheel bracket, calibrate the perpendicularity between the pressure wheel and the board with a square (error ≤0.1°), and then adjust the pressure wheel pressure to be uniform (left-right pressure difference ≤0.1MPa).
- Speed Synchronization: Enter the edge banding machine control system, check the parameters of the large pressure wheel linear speed and workpiece conveying speed, and ensure they are consistent (error ≤0.1m/min); re-calibrate the encoder if the parameters are abnormal.
- Emergency Measures: The edge banding can be temporarily fixed with tape for guided feeding, but formal maintenance should be completed as soon as possible to avoid equipment damage.
(2) End-trimming Alarm: Fault Troubleshooting of Stroke and Power System
- Core Causes: Abnormal return of the rear end-trimming device, loose wire connection, motor overload, and offset travel switch.
- Troubleshooting and Maintenance Steps:
- Return Inspection: Manually push the rear end-trimming mechanism. If there is jamming, clean the glue residue and foreign objects in the track, and apply high-temperature grease; check the return spring, and replace it with a new one if the elasticity is insufficient (stretching length >20% of the original length).
- Circuit Detection: Turn off the power, check the wire connector of the end-trimming motor. If it is loose or broken, reconnect it and wrap it with insulating tape; measure the motor coil resistance with a multimeter. If the resistance is 0 or infinite, the motor is damaged and needs to be replaced.
- Overload Reset: Press the overload protection button on the motor. If it can be reset, check the motor load (such as whether the end-trimming knife is stuck); if it cannot be reset, troubleshoot the circuit or replace the motor.
- Travel Switch Calibration: Adjust the position of the front end-trimming downward signal travel switch to ensure tight contact between the switch and the collision block (gap ≤0.5mm); replace the travel switch with the same model if it is damaged.
(3) Uneven Glue Coating/Glue Leakage: Cleaning and Calibration of the Glue Circuit System
- Core Causes: Unperpendicular pre-milling knife, impurities on the glue coating roller, insufficient glue temperature, insufficient glue in the glue tank, and offset guide plate.
- Troubleshooting and Maintenance Steps:
- Tool Calibration: Check the perpendicularity of the pre-milling knife with a square. If the error is >0.1°, loosen the tool fixing nut, adjust the knife holder angle to perpendicularity, then tighten and test mill.
- Glue Roller Cleaning: Turn off the glue tank heating, wait for the glue to cool, remove the glue coating roller, clean the glue residue on the surface with a scraper, and then wipe it clean with alcohol; if there are scratches on the glue roller surface (depth >0.1mm), it needs to be ground or replaced.
- Temperature and Glue Amount: Measure the glue tank temperature with a thermometer to ensure it reaches the set value (EVA 170-190℃, PUR 120-150℃); add hot-melt glue to 2/3 of the glue tank height to avoid insufficient glue supply due to low glue level.
- Guide Plate Adjustment: Loosen the fixing screws of the guide plate in front of the glue roller, adjust the gap between the guide plate and the glue roller to 0.1-0.2mm to ensure uniform glue outflow; check if the guide plate is deformed and replace it if necessary.
- Glue Circuit Inspection: If glue leaks, check if the glue pipe connector is loose and replace the aging sealing ring; clean the blockage in the glue pump to ensure smooth glue circuit.